Appearance
Optimizer Setup for Product Pages
Create an Optimizer for Your Product Campaign
An optimizer is like your experiment manager for a set of similar pages (in this case, product URLs).
The first step is to create an optimizer that will handle the product pages you want to test. Not using the default optimizer allows you to customize the URL of the landing page dynamically based on the product being tested, as well as giving you more control over the in-page tracking events and analytics.
Go to the Optimizer section in your admin panel.
Click Create Optimizer.

Fill in the details:
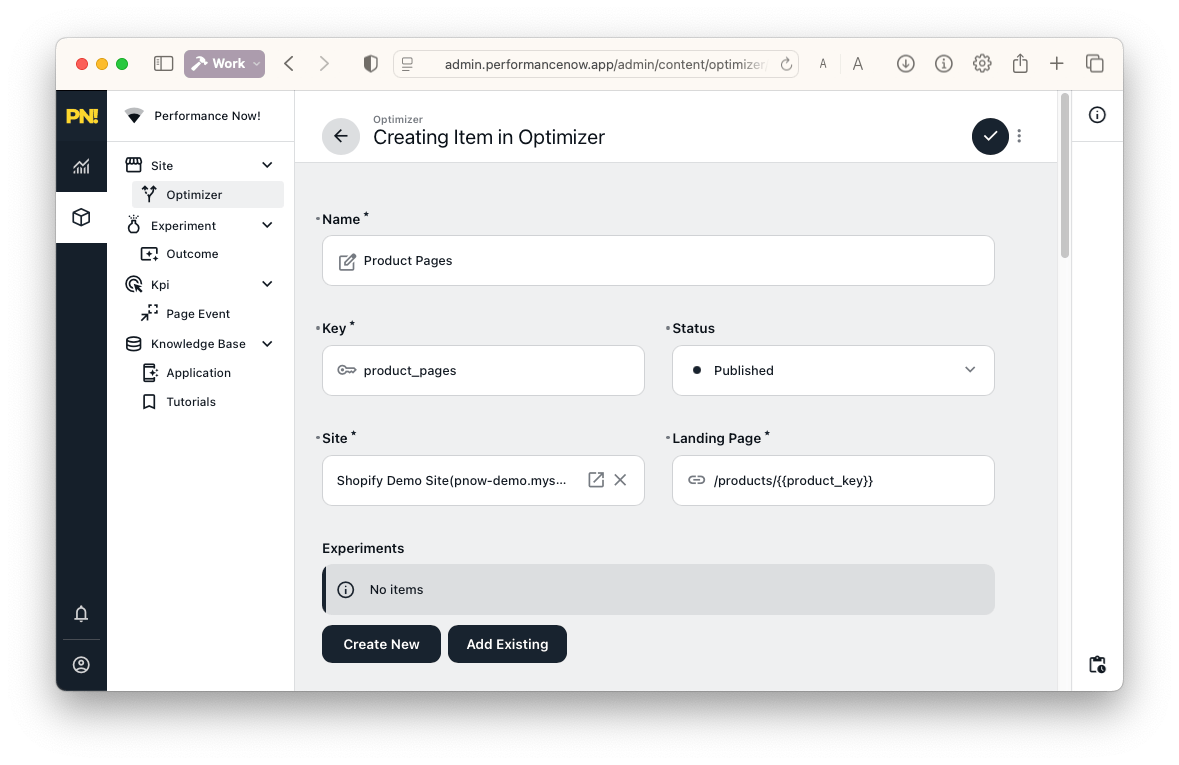
- Name: Product Pages (or any name you’ll recognize)
- Key:
product_pages
This will be the variable that changes in your URLs. - Status: Published
- Landing Page:
/products/
This tells Performance Now! to dynamically send visitors to different product pages based on the tested outcome.product_keywill be replaced with the actual product URL slug during the test. and must match the key you will use in the experiment.
Why this matters:
You only need one product optimizer, even if you test dozens of products—scales easily as your catalog grows.
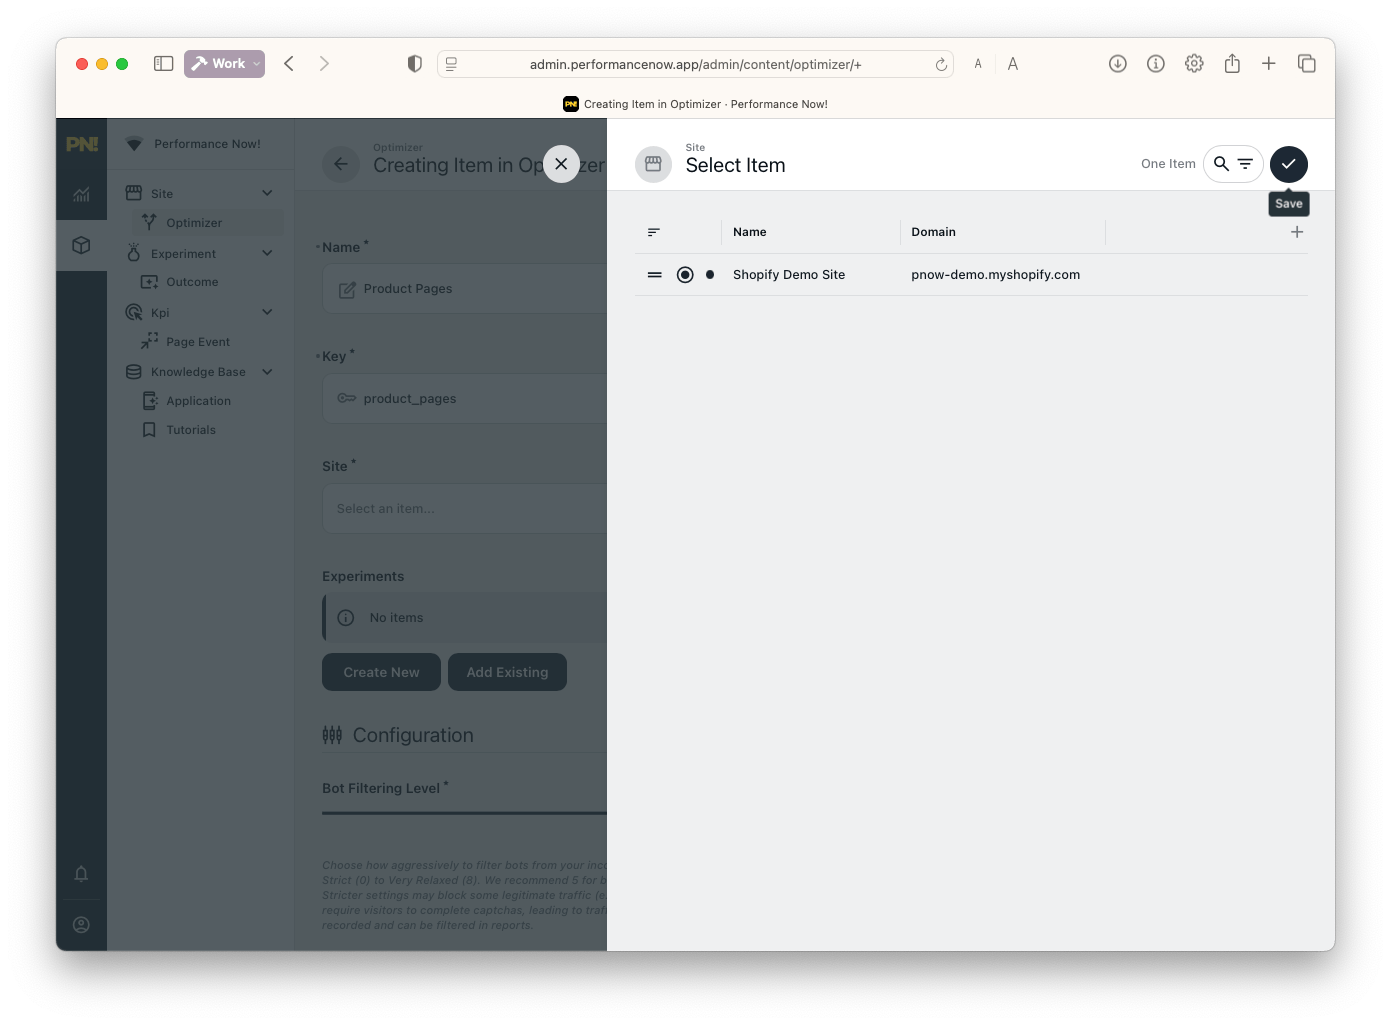
- Link the new optimizer to your Site.
Add In-Page Tracking Events
To measure real engagement, you need to track not just page loads, but meaningful actions (like how long a user views the page).
- In the In Page Tracking section of the optimizer, click Add Existing.
- Add all “View” events available (e.g., "View 1 second", "View 5 seconds").
These are auto-detected based on your actual page content.
![]()
- Save the Optimizer.
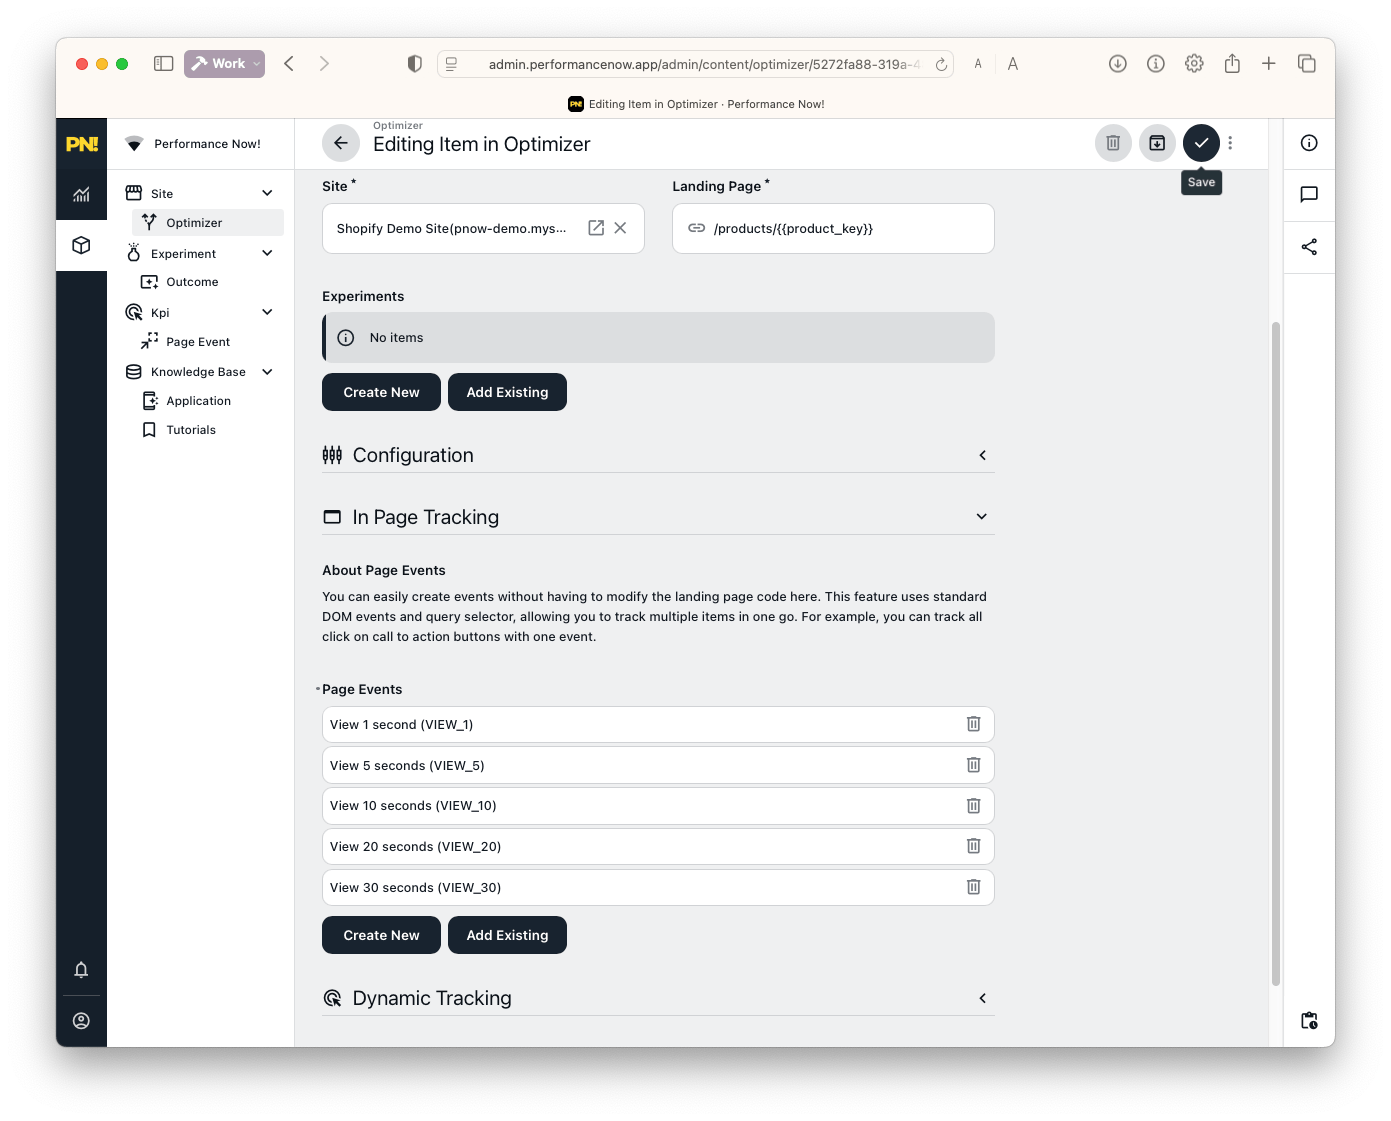
Tip:
More events = deeper funnel insights. This lets you later analyze not just “did someone land here?” but "how deep was the engagement with this product?".