Appearance
Shopify Setup
Shopify sites require a unique integration method to ensure full tracking and reliable live A/B testing.
WARNING
Do not use the standard JavaScript tag for Shopify—follow these steps to avoid conflicts and guarantee accurate results.
Why Use Two Tags?
Shopify’s architecture requires two separate tags to function correctly:
- Customer Events Tag: Captures specific events like purchases and add-to-cart actions.
- Theme Integration Tag: Enables live experiments and A/B tests across your store. This two-tag system ensures that all events are tracked accurately and that live testing works seamlessly.
Important:
- Do not mix the Shopify tags with the standard JavaScript tag.
- Never place both tags on the same page.
- Mixing tags can lead to data loss or broken tracking.
- If you have already added the standard tag, remove it before proceeding with the Shopify tags.
- If you need to use the standard tag for other pages, ensure it is not on the same page as the Shopify tags.
- If you have any questions or need help, please contact support.
Integration Overview
Shopify integration uses two distinct tags:
Customer Events Tag – Tracks purchases, add-to-cart, and other Shopify-specific events.
Theme Integration Tag – Enables live experiments and A/B tests on every page.
Never mix Shopify tags with the standard website tag.
Mixing tags will result in lost data or broken tracking.
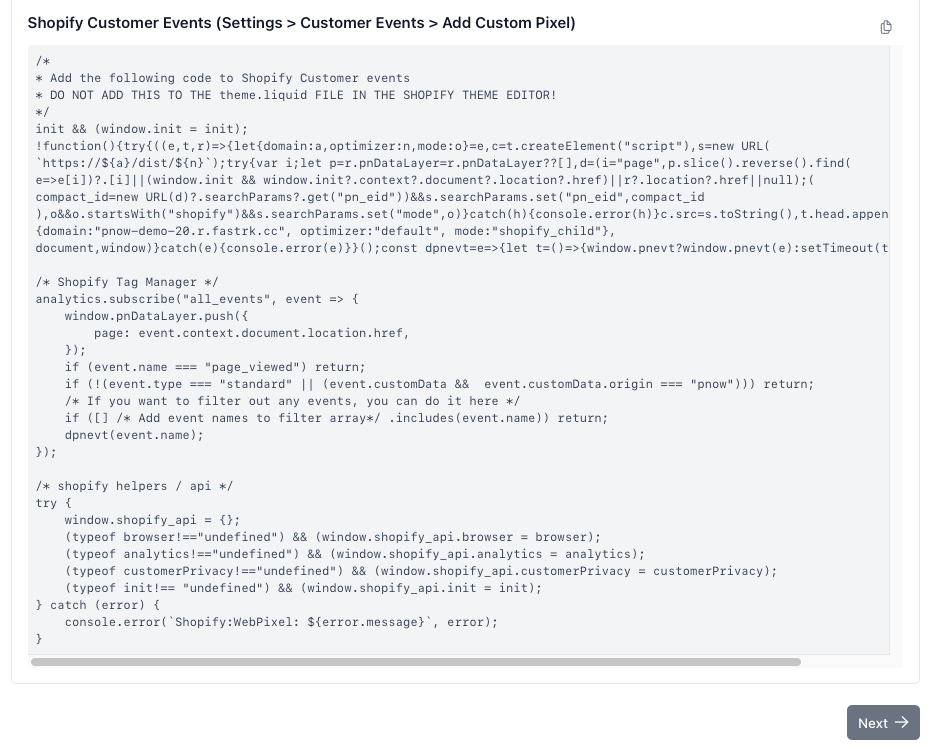
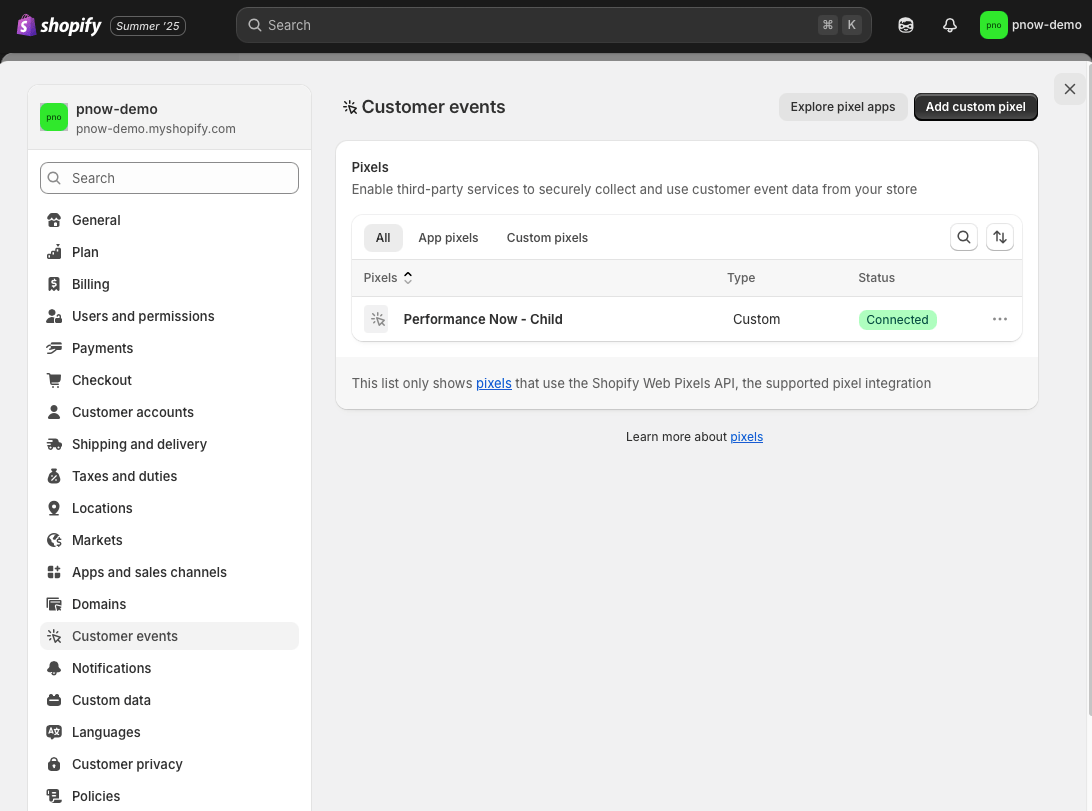
Step 1: Add the Customer Events Tag
- In your Shopify admin, go to Settings > Customer Events.
- Locate the field for custom scripts or tags (depends on Shopify version), and "Add Custom Pixel".
- Paste the Customer Events Tag provided in your Dashboard Quick Setup.

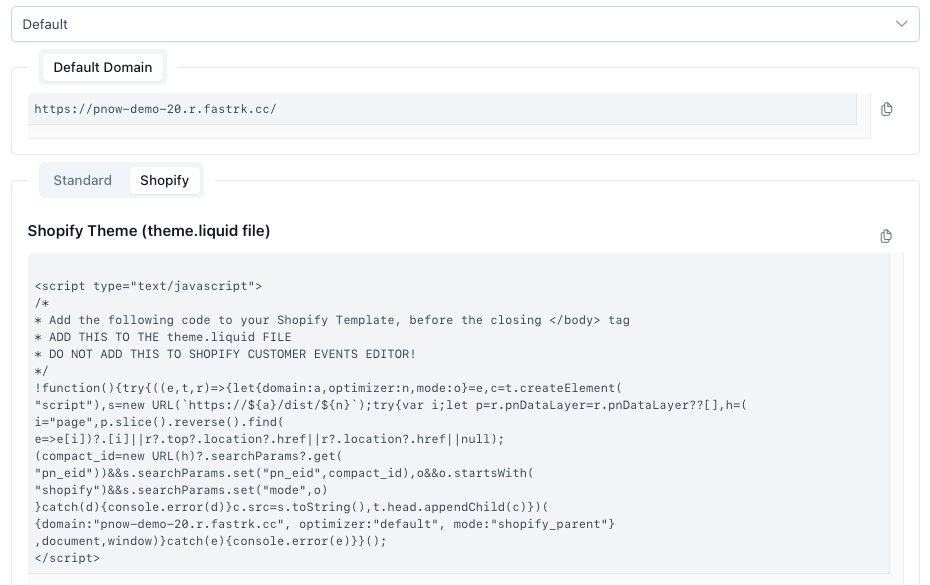
Step 2: Add the Theme Integration Tag
Always perform a backup before editing your theme.
Before making any changes, always backup your theme. You can do this by duplicating your theme in the Shopify admin. This way, if something goes wrong, you can easily revert to the original version.
- In Shopify, go to Online Store > Themes.
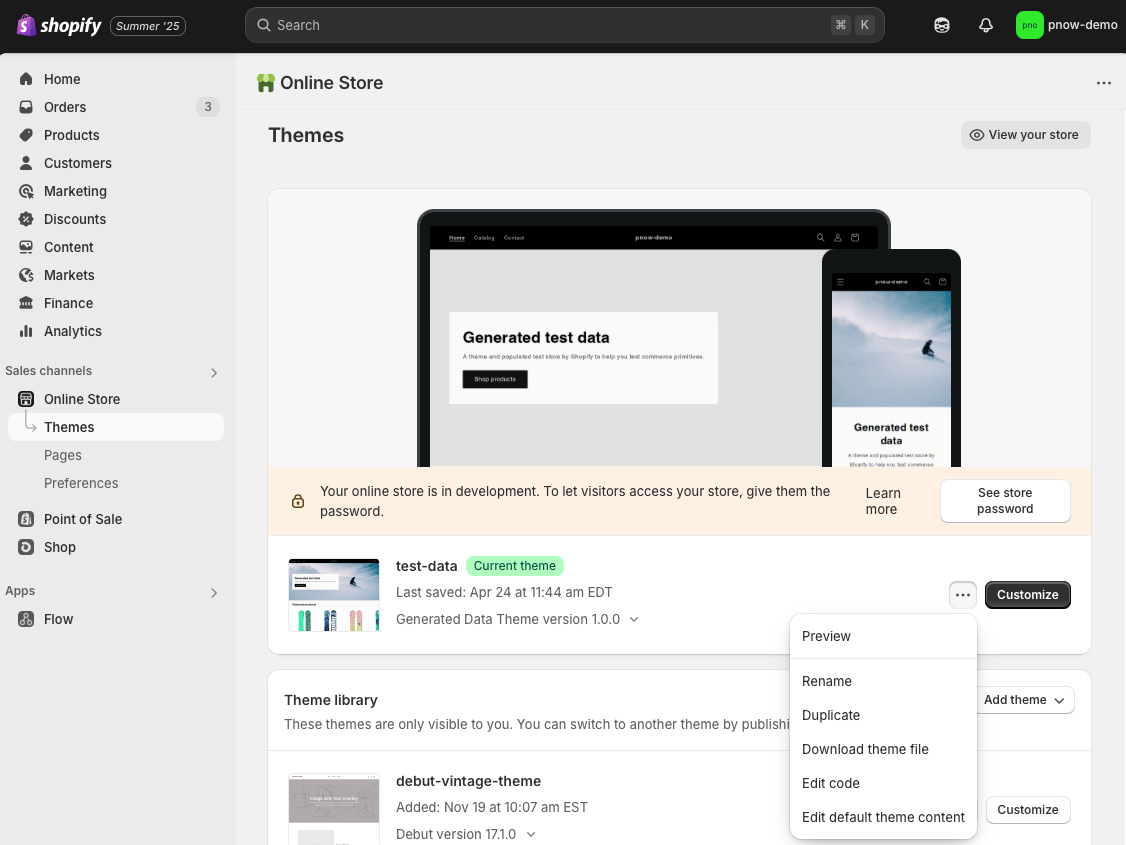
- Click Actions > Edit code for your active theme.
- Open the
theme.liquidfile. - Paste the Theme Integration Tag just before the closing
</body>tag.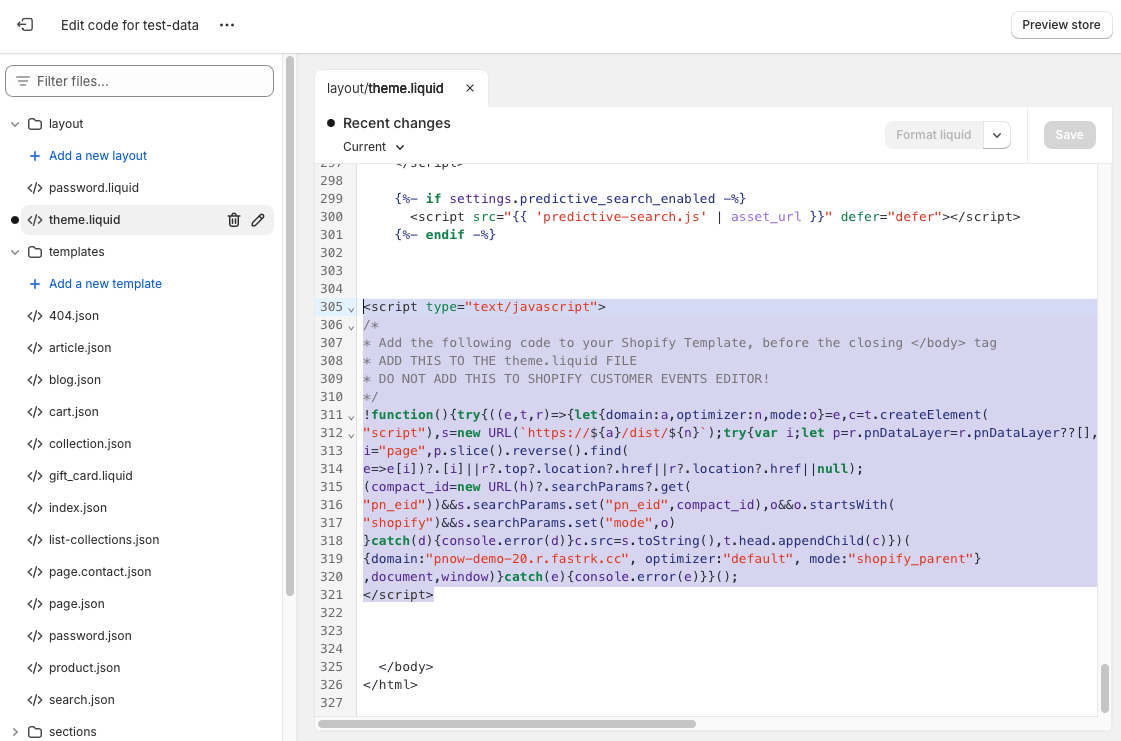
Do not add the Theme Integration Tag in Shopify’s tag manager or to the Customer Events field.
Step 3: Final Checklist
- Confirm both tags are present and never used together with the standard tag.
- Do not swap or combine tag types between Shopify and non-Shopify pages.
- Save and publish your changes.
Verifying Your Setup
- Visit your Shopify store as a shopper.
- Open your Performance Now! dashboard. You should see event data appear within a few minutes.
- If you see no data, double-check your tag placements or see [FAQ]../support/faq.md).
Need help? Contact support for step-by-step assistance.